Are you ready to take your video editing skills to the next level? Dive into the exciting world of DaVinci Resolve 18 and unlock its full potential to elevate your video quality like never before! In this article, we will explore the ins and outs of mastering the latest version of this powerful software. From sleek transitions to stunning color grading, let’s embark on a journey towards creating professional-looking videos that stand out from the crowd. Whether you’re a beginner looking to enhance your editing skills or a seasoned pro seeking new techniques, DaVinci Resolve 18 has something for everyone. Get ready to unleash your creativity and transform your videos into cinematic masterpieces!
Unleashing the Magic of Sky Replacement: Elevate Your Video Quality
Unleashing the magic of sky replacement in DaVinci Resolve can truly elevate your video quality to new heights. One of the most captivating effects mentioned is the ability to seamlessly replace a dull, plain sky with a vibrant, textured cloudy sky. By utilizing the sky replacement tool in the color tab, you can work wonders to transform the atmosphere of your footage. With a bit of practice and experimentation with settings, you can achieve a visually stunning result that enhances the overall impact of your video. Additionally, mastering this effect can make moving shots appear incredibly realistic through precise tracking techniques.
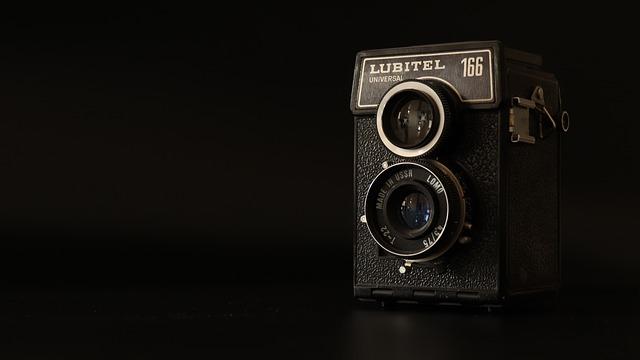
Another gem in the treasure trove of effects in DaVinci Resolve is the prism blur effect, which adds a touch of vintage charm to your footage. By applying the prism blur effect strategically, you can mimic the aesthetic of being shot with an old lens, bringing a unique character to your videos. You can customize the blur to create a vignette-like effect, focusing on specific areas of your frame to achieve a cinematic look. These creative tools not only enhance the visual appeal of your videos but also offer endless possibilities for unleashing your creativity in the realm of video editing.
Prism Blur Effect: Transform Your Footage into Vintage Masterpieces
Are you looking to elevate your video quality and transform your footage into vintage masterpieces? Look no further than leveraging the Prism Blur Effect in DaVinci Resolve 18. Imagine giving your videos that nostalgic, old-world charm with just a few simple tweaks. The Prism Blur Effect works wonders in making your footage appear as if it was shot with a classic, vintage lens. By applying this effect on a node and adjusting the settings to your liking, you can enhance the overall aesthetic of your video effortlessly. Want to emphasize certain elements within the frame? Utilize the circular window feature to create a vignette effect, adding a touch of artistry to your footage.
But why stop there when you can take your video editing skills to the next level? Another must-try effect is the Camera Shake effect, perfect for adding a handheld feel to tripod-shot footage. By adjusting parameters like motion, speed scale, and randomness, you can achieve a realistic handheld effect that enhances the dynamic energy of your video. And don’t let lackluster lighting conditions dim your creative vision – with the Light Rays effect, you can infuse your footage with stunning sun rays to capture that magical sunrise or sunset moment. This effect allows you to play with angles and colors to create a captivating visual experience for your audience. Whether you’re a fan of vintage aesthetics or aiming for a modern cinematic look, these effects in DaVinci Resolve 18 open up a world of creative possibilities for your video projects.
Creating Realistic Handheld Shots with Camera Shake
in DaVinci Resolve can significantly elevate the quality of your videos, adding a dynamic and immersive element to your footage. To achieve this effect, start by applying the Camera Shake effect to your footage. Adjust settings like motion, speed, scale, amplitude, and most importantly, randomness to simulate a natural handheld look realistically. Whether you want to transform a tripod-shot scene into a handheld one or add a sense of urgency and realism to your video, this effect is a game-changer.
Furthermore, to enhance the authenticity of your video, consider incorporating other effects like light rays to add a touch of magic to your footage. By dropping the light rays effect onto your clip and adjusting settings like angle and color, you can create a mesmerizing visual impact, adding a cinematic flair to your content. Additionally, experimenting with effects like halation can infuse a vintage film aesthetic into your videos, giving highlights and high-contrast areas a soft glow reminiscent of classic film styles. These creative effects are not just tools for enhancement but also opportunities to craft storytelling elements that captivate viewers and elevate the overall video quality. By mastering these effects in DaVinci Resolve, you can unlock a world of creative possibilities and take your videos to the next level.
Capturing the Mystical Light Rays: Enhancing Your Visuals
Ah, the mystical light rays and enhancing visuals in DaVinci Resolve 18 – a world of endless possibilities! Let’s dive into some of the secrets behind captivating video effects that can truly elevate your visual storytelling game. ✨
First up, imagine effortlessly transforming a dull, plain sky into a breathtaking masterpiece with the Sky Replacement tool. By selecting the sky, adding the magical touch of the sky replacement effect, and tweaking the settings, you can turn a mundane shot into a scene straight out of a dream. And if your footage is in need of a vintage touch, look no further than the Prism Blur effect. This effect adds a nostalgic feel as if your video was shot with a classic lens, giving it that extra oomph it was missing. Plus, with the Camera Shake effect, you can easily create the illusion of a handheld shot, adding a touch of realism to your footage. It’s all about those fine details that make a world of difference in your visual storytelling journey. 📽️
Q&A
Q&A for
Q1: What are some of the key effects mentioned in the video transcript that can enhance video quality in DaVinci Resolve?
A: In the video transcript, the speaker highlights several effects that can elevate the quality of your videos in DaVinci Resolve. These effects include sky replacement, prism blur, camera shake, light rays, halation, film grain, flares, lens reflections, and tilt-shift blur. Each effect serves a unique purpose in enhancing the visual appeal of your videos, from creating realistic sky textures to adding vintage film aesthetics.
Q2: How can the sky replacement effect be utilized in DaVinci Resolve to enhance video footage?
A: The sky replacement effect in DaVinci Resolve allows you to transform a plain-looking sky in your footage into a beautiful, textured sky. By using tools like magic mask or qualifier tool to select the sky, you can then add the sky replacement effect and adjust settings to achieve the desired sky texture. Additionally, for moving shots, you can even track the movement to ensure a seamless and realistic sky replacement.
Q3: What is the purpose of the prism blur effect mentioned in the video transcript?
A: The prism blur effect in DaVinci Resolve mimics the appearance of footage captured with an old lens, adding a nostalgic and vintage vibe to your videos. By adjusting the settings of the prism blur effect on a node, you can achieve a cinematic look for your footage, reminiscent of older film styles. Furthermore, you can create a vignette effect by selectively blurring the edges of the frame using window settings.
Q4: How can the camera shake effect be used to enhance video sequences in DaVinci Resolve?
A: The camera shake effect in DaVinci Resolve allows you to simulate handheld camera movements, even if the original footage was shot using a tripod. By adjusting settings such as motion, speed scale, amplitude, and randomness, you can create a realistic handheld effect that adds dynamism and authenticity to your videos.
Q5: How can the light rays effect be applied in DaVinci Resolve to improve video quality?
A: The light rays effect in DaVinci Resolve enables you to add sun rays or other light effects to your footage, enhancing the visual appeal and atmosphere of your videos. By adjusting settings such as angle and color, you can customize the appearance of light rays and create a stunning visual impact in your scenes.
Mastering DaVinci Resolve 18 offers a plethora of effects and tools to elevate the quality of your video projects, allowing you to unleash your creativity and enhance the visual appeal of your content. Experiment with these effects in DaVinci Resolve to add depth, style, and professionalism to your videos. Remember, these effects are meant to enhance good shots, not to fix bad ones, so always strive for excellence in your original footage. Dive into the world of DaVinci Resolve and take your video editing skills to the next level!
The Way Forward
As we conclude this journey of mastering DaVinci Resolve 18 and elevating our video quality, let’s reflect on the power of visual effects to enhance our storytelling. From transforming plain skies into textured wonders to adding prism blur for that vintage film look, each effect brings a new dimension to our videos.
The camera Shake effect effortlessly simulates handheld shots, while light rays and halation create ethereal and dreamy atmospheres. With the lens Reflections effect and tilt-shift blur, we can play with perspectives and create unique visual experiences that captivate our audience.
Whether it’s adding flares for a touch of magic or experimenting with custom film grain, these effects are tools to unleash our creativity and elevate our storytelling. Remember, while post-production magic is valuable, it can never replace the art of capturing great shots in-camera.
So, as we wrap up this insightful exploration of DaVinci Resolve effects, let’s continue to push boundaries, experiment fearlessly, and strive for excellence in every frame we capture. Thank you for joining me on this journey, and I look forward to seeing your artistic endeavors flourish. Until next time, keep creating magic on screen!
